Steps to Download proper version of java:
In this tutorial we will learn how to install JDK and path settings for java environment.
Follow below steps to setup JAVA (Version 1.7.0_79) environment.
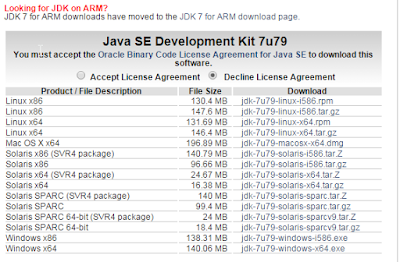
First please download the correct jdk version from the below link.
Step 2:
On the download page you have to click on radio button to accept terms and conditions of oracle.
Step 3:
Select appropriate version as per your requirement. Click on download link to start downloading JDK. Setup is nearly about 130-140 mb.
I am running java on Windows 7 (32-bit) therefore now I have selected suitable version for me as Jdk-7u79-windows-i586.exe.
 |
| JDK downloading |
 |
| JDK Download Completed |
JDK (Java) Download Completed...
Steps to install java
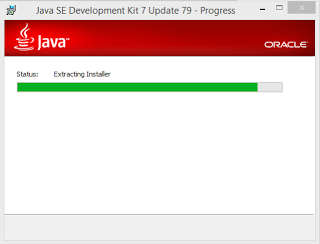
1) Please double click on above downloaded Jdk-7u79-windows-i586.exe file to start Java installation.
Click on Next
Select "Development Tools".
If you want to change installation path, you can click on "Change" Button. I am keeping the default location as "C:\Program Files (x86)\Java\jdk1.7.0_79\" and then click on "Next" button.
Now it will ask for destination folder to install java....
If you want to change installation path, you can click on "Change" Button. I am keeping the default location as "C:\Program Files (x86)\Java\jdk1.7.0_79\" and then click on "Next" button.
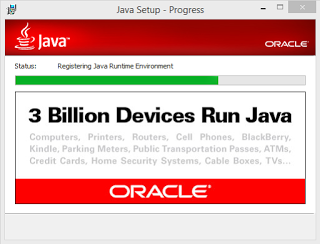
Now it will start setting up java.
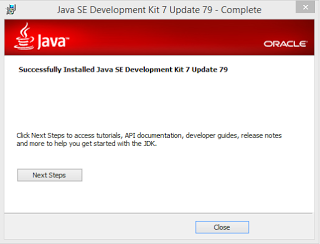
Java Setup done. Now click on "Close" Button to exit the jdk complete window.
Java Installation completed....
Java Classpath Setting
Windows 7:
- From the desktop, right click the Computer icon.
- Choose Properties.
- Click the Advanced system settings link.
- Click Environment Variables. In the section System Variables, find the PATH environment variable and select it. Click Edit. If the PATH environment variable does not exist, click New.
- In the Edit System Variable (or New System Variable) window, specify the value of the PATH environment variable. Click OK. Close all remaining windows by clicking OK.
JAVA Home setting:
Variable Name: JAVA_HOME
Variable Value: C:\Program Files (x86)\Java\jdk1.7.0_79\ (in my case)
PATH setting:
Variable Name: path
Variable Value: %JAVA_HOME%\bin
Classpath setting:
Variable Name: classpath
Variable Value: %JAVA_HOME%\lib
Save the variables, test the setting by opening a DOS prompt, type in
echo %CLASSPATH%
If your environment variables are set correctly, you should see your settings.
Or, you can just type in
javac
java
If your PATH and CLASSPATH are correct, windows should recognize those commands.
You do NOT need to restart your computer when installing Java.
How to Check whether java (JDK) is Installed or not ?
Step 1 : Checking Directory Structure
- After installing JDK you need to check directory whether java installed or not.
- Open My Computer and Check Java Installation Directory.
- These two folders gets created inside “My Computer => C Drive => Program Files (x86) => Java“.
- Check inside JDK bin folder (i.e. C:\Program Files (x86)\Java\jdk1.7.0_79\bin) for "java","javac" application files.
- If these files are present then 75% we are on the right track. Now let us check whether "javac" is working properly or not.
Step 2: Writing Sample HelloWorld.java Program
- Create “code” folder inside C Drive. (call it as – HelloWorld.java)
- Copy paste following code snippet and paste into notepad. (Don't forgot to save File using .java extension).
class HelloWorld {
 public static void main(String args[]) {
  System.out.println("Welcome to Java");
 }
}
- Note : Select File Type as All files.
- Now open Command Prompt.
- Type following Commands.
C:\Users\user205>cd C:\code
C:\code>javac HelloWorld.java
C:code>java HelloWorld
Welcome to Java
C:code>
How to check installed java version in system
- Open Command Prompt.(Shortcut: windows button + R key and enter cmd and press enter).
- Make sure that you have set up class path.
- Just type following command “java -version” inside command Prompt.
C:code>java -version
java version "1.7.0_79"
Java(TM) SE Runtime Environment (build 1.7.0_79-b15)
Java HotSpot(TM) Client VM (build 24.79-b02, mixed mode, sharing)
- It will return you the version you are using.
Java Environment setup done. Now you can develop java applications.


